This vignette demonstrates how to build a polyglot pipeline and
assumes you’ve read vignette("polyglot").
Running pipelines on GitHub Actions
Running pipelines on GitHub Actions is quite easy. First, run the
rxp_ga() function in your project’s root. This will
generate a GitHub Actions .yaml file to run the pipeline on
each push or pull request. Here are the different steps that happen:
- if previous run artifacts exist, those are restored to avoid
recomputing them using
rixpress::rxp_import_artifacts(); - required software is installed;
- the execution environment is generated and built;
- the
rstats-on-nixcache is configured to decrease build times, see this documentation (ignore the part about installingNix); - the pipeline is generated (and potentially built, depending on
whether you set
buildtoFALSEin therxp_populate()call); - the DAG gets printed;
- the pipeline is built: if you set
buildtoTRUEpreviously, the build process is skipped anyway; - the build artifacts and their paths are printed;
- the build artifacts are archived for reuse using
rixpress::rxp_export_artifacts()for subsequent runs and are pushed to therixpress-runsbranch.
Let me explain how to view the DAG in CI. In an interactive session,
you only need to call plot_dag() to see a graphical
representation of the pipeline. But in CI, since there’s no graphical
interface, you need to use a tool that allows you to represent the
pipeline in text mode. One such tool is the stacked-dag
package for the Haskell programming language. It takes an
igraph object as a .dot file, and returns a
textual representation of the DAG. So, there’s a step in the
.yaml file used to run the pipeline in CI that does exactly
this:
- name: Check DAG if dag.dot exists and show it if yes
run: |
if [ -f dag.dot ]; then
nix-shell --quiet -p haskellPackages.stacked-dag --run "stacked-dag dot _rixpress/dag.dot"
else
echo "dag.dot not found"
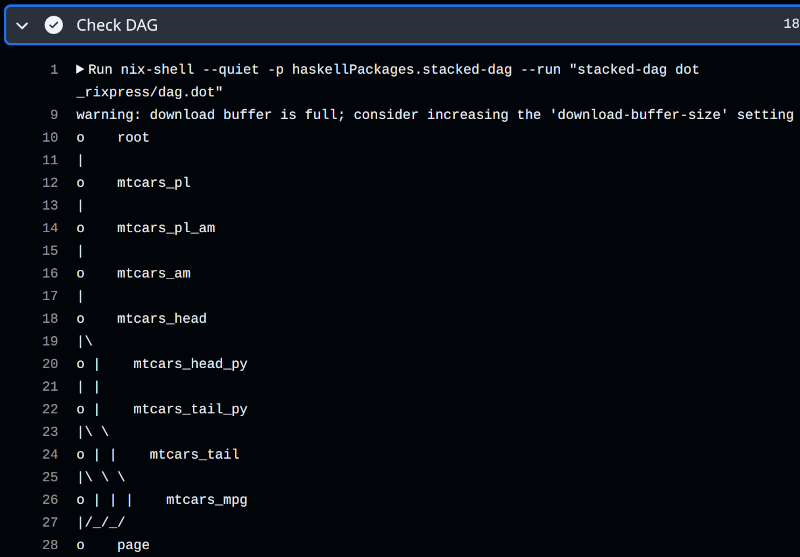
fiAs you can see, stacked-dag processes the file from the
_rixpress/dag.dot folder. When calling
rxp_ga(), the rxp_dag_for_ci() function is
called automatically to generate the .dot file and put it
in the right spot.
Here is what this looks like: